Chewing Gum Remover: Easy DIY Tips
Struggling with chewing gum remover? Learn easy tips to tackle sticky gum with household tricks. Discover effective methods to clean any surface today!

- Have You Ever Found Yourself in a Sticky Situation with Chewing Gum?
- The Chewing Gum Dilemma: A Quick Background
- Gum Away: A Culinary Journey
- Your New Favorite Gum Away Solution
- Health and Nutrition Highlights
- Recipe at a Glance
- Essential Components Guide: Uncovering the Basics
- Kitchen Equipment Essentials
- Professional Cooking Guide: Mastering the Art of Food Preparation
- Success Guaranteed Tips
- Perfect Presentation
- Storage and Make-Ahead
- Creative Variations
- Complete Nutrition Guide
- Expert FAQ Solutions
- Recipe Card
Have You Ever Found Yourself in a Sticky Situation with Chewing Gum?
Oh my gosh, we've all been there, right? you’re enjoying a lovely day, maybe chilling at the park or having a blast at a birthday party, and suddenly—bam!—you’ve got a glob of chewing gum on your favorite jeans or stuck to your carpet.
You might wonder, “is there a way out of this sticky mess without ruining my favorite things?” well, let me tell you, there absolutely is! today, i'm diving into the wondrous world of gum away: the ultimate chewing gum remover recipe, a diy solution that will rescue your beloved items from the perils of sticky gum.
So, what makes this recipe special ? it's super easy, doesn't take more than ten minutes, and uses ingredients you probably already have at home.
Seriously, you can be the hero of your household in no time. plus, this method is designed to be gentle on fabrics while still getting the job done effectively.
Perfect for kids and adults alike!
The Chewing Gum Dilemma: A Quick Background
Historically, gum has been around for centuries, but we’re not here to give a history lesson on ancient chewing delights.
Instead, let’s focus on how that innocent delight can turn into the bane of our existence. when it comes to getting rid of gum, the stakes feel high! after all, who wants to deal with an unsightly mess on their favorite rug or outfit? luckily, crafting your own gum remover is not only eco-friendly and non-toxic, but it’s also remarkably effective.
Just think of the smug sense of achievement when you rescue your belongings!
Gum Away: A Culinary Journey
If you dig into the roots of this recipe, it’s like a time capsule of household wisdom passed down through generations.
The combination of ice, vinegar, and vegetable oil (or peanut butter if you’re feeling adventurous) has been a go-to for many who have faced the sticky aftermath of gum.
The secret is that the cold hardens the gum, making it easier to peel away, while vinegar helps to dissolve any remnants.
With a bit of care, you’ll find that this method not only helps with gum removal, but it also becomes a nifty lesson in diy cleaning hacks for your home.
Your New Favorite Gum Away Solution
Now let’s talk about the good stuff—flavor combinations, if you will! (well, not edible flavors, but you catch my drift).
This recipe plays on the contrasts of cold and warmth to tackle that pesky gum. the ice technique for gum removal literally freezes the gum in its tracks, and then the vinegar cleaning solutions work with a gentle touch to lift any leftover residue.
Plus, using peanut butter as a cleaning agent? genius! it’s like a two-for-one deal: you get to remove gum while making an accidental afternoon snack (who hasn’t done that?).
Health and Nutrition Highlights
Not to startle anyone, but this is not an edible recipe, so let’s skip the nutritional breakdown. however, i can ramble on about how this method uses natural cleaning ingredients and essential oils if you want to make your space smell fresh.
The wellness advantage lies in knowing you’re not using harsh chemicals that could do more harm than good, especially when you’ve got little ones running around exploring their world—safety first, friends!
Recipe at a Glance
Okay, let’s recap:
- Total Prep Time: 5 minutes (just gather your stuff!)
- Skill Level: Easy-peasy, my friends—if you can freeze ice, you can do this!
- Serving Size: Sufficient to tackle one medium-sized gum removal task (perfect for that sticky gym-floor incident).
- Cost Efficiency: Super budget-friendly! You’re probably looking at less than $5 for everything.
If you’re ready to roll up your sleeves and take on that sticky gum, hang tight! the next section is where i lay out the ingredients you’ll need, and trust me, it’s as easy as pie (or should i say, as easy as ice?).
Stay tuned as we turn those stubborn gum stains into a distant memory!

Essential Components Guide: Uncovering the Basics
Ah, the kitchen! it's our little sanctuary, right? but you know, sometimes a recipe can feel like it’s throwing you into the deep end.
So, let's break down the key ingredients and equipment you really need — the essentials that set the foundation for so many yummy dishes.
Premium Core Ingredients
This part is like your shopping list for success! Here’s the 411 on what to grab.
-
Detailed measurements : let’s kick things off with the basics. when a recipe says a cup of this and a teaspoon of that, you want to be specific.
Too much of this, and your dish might taste like a salt lick. too little, and it could be flat.
Use dry measuring cups for solids and liquid measuring cups for liquids—trust me; it makes a difference!
-
Quality indicators : you know that moment when you walk into the grocery store and see the endless choices? look for high-quality ingredients.
For oils, that means extra virgin olive oil. for herbs, check freshness — if they crumble in your fingers, they’re too old.
And with spices, if they don’t have a rich aroma, they’ve outstayed their welcome.
-
Selection Tips : Choose seasonal and local ingredients whenever possible. They not only pack more flavor, but they also support local farmers. It's like keeping your cooking honest, you know?
-
Storage guidance : last thing we need is sad, wilted vegetables or hard-as-a-rock brown sugar. keep herbs in a glass with water like a bouquet and store your spices in a cool, dark place.
And oh — an airtight container for that sugar? life saver!
Signature Seasoning Blend
Now that the pantry is packed, let’s chat seasonings — the magical fairy dust of cooking!
-
Spice Combinations : Think of spices as friendships. Some just vibe together. A pinch of cumin with coriander can transform a bland dish into something divine.
-
Herb Selections : Fresh is always best. Basil, thyme, and parsley should be your go-to all-stars. And they're super fun to grow, trust me!
-
Flavor Enhancers : Stocksome broth, miso paste, or a splash of soy can help create a umami bomb in your meals. Seriously, don’t sleep on those.
-
Aromatic Additions : You know that divine moment when something sizzles in the pan? That's the beauty of aromatics, my friends! Onions, garlic, and ginger are the holy trinity here.
Smart Substitutions
Oh man, substitutions are where it gets fun. You gotta be flexible, and I’m all about those hacks!
-
Alternative Options : If a recipe calls for buttermilk and you’re fresh out, mix one cup of milk with a tablespoon of vinegar. Boom, buttermilk acting skills unlocked.
-
Dietary Swaps : Vegan? Nut butters can replace butter in baking, or flaxseed mixed with water can act as an egg.
-
Emergency Replacements : Running low on flour? You can get crafty with oats turned into oat flour or almond flour for gluten-free glory.
-
Seasonal Variations : Use what’s fresh! If a dish calls for spinach but kale is in season, go for it! Cooking is all about adapting.
Kitchen Equipment Essentials
Okay, now let’s talk tools. Imagine trying to bake a cake with a spoon instead of a whisk — yeah, not cool!
-
Must-Have Tools : You need a good knife, chopping board, and mixing bowls. They’re the holy trifecta of cooking.
-
Recommended Appliances : While some folks love their fancy gadgets, a good blender and a slow cooker can take you a long way without crowding your kitchen.
-
Helpful Gadgets : A microplane for zesting, a digital scale for precision, and a good ol’ instant-read thermometer — all absolute essentials!
-
Home Alternatives : Don't have a rolling pin? A wine bottle works in a pinch! Improvise, and you won’t feel so stressed.
Pro Ingredient Tips
Before we gear up for the next section on the cooking process (yay!), here are some pro tips:
-
Selection Secrets : When buying meat, opt for organic. It’s often fresher and tastier. Can't put a price on flavor!
-
Quality Markers : Look for labels; if it says “grass-fed” or “wild-caught,” you’re on the right track.
-
Storage Solutions : Freeze herbs in an ice tray with olive oil for quick flavor bombs later.
-
Money-Saving Tips : Buy in bulk if you can. Plus, using what’s leftover can cut costs; think about how to toss leftover veggies into soups or stir-fries.
And just like that, you’ve got the rundown on essential kitchen stuff. Next up, we’ll dive into the exciting part: those step-by-step instructions that’ll have you whipping up your culinary masterpieces in no time! Can't wait to share those cooking hacks with you!
Professional Cooking Guide: Mastering the Art of Food Preparation
Hey there, lovely readers! today, i want to chat about something super important in the world of cooking— professional techniques that can completely elevate your kitchen game.
I remember the first time i attempted a complicated recipe without knowing these essential tips. let’s just say it didn’t end quite how i envisioned! but, no worries; i've learned from those culinary misadventures, and i'm here to share them with you, step-by-step.
Essential Preparation Steps
First, we need to talk about mise en place . this french concept simply means “everything in its place,” and trust me, it’s a game changer.
Before you even start cooking, gather all your ingredients and tools. and i mean everything—spices, chopping boards, pots, little measuring spoons you forgot existed.
Just imagine it: your kitchen counter looking like a beautiful rainbow of ingredients waiting to be transformed.
Now, about prep techniques —chopping, dicing, and slicing. here’s a little challenge: try to perfect your knife skills. i promise you, there’s something oddly satisfying about finely dicing an onion without shedding too many tears.
And let’s be honest, practicing these skills over and over just makes cooking more enjoyable!
Now, let’s get into time management . the goal is always to optimize for efficiency; nobody wants to spend hours simmering sauce while the pasta’s sitting there getting cold.
My tip? always utilize your downtime. think of your tasks like a game of tetris. for example, while your meat is browning, chop up your veggies.
It’s like cooking multitasking zen!
Professional Cooking Method
On to the cooking method! think of cooking as a science experiment. here’s a step-by-step process you can use: start with heat —always ensure you preheat your pan.
Medium-high heat is usually a safe bet; it helps to create that dreamy sear on meats.
Timing precision is everything. If a recipe says 8-10 minutes for sautéing, set a timer for 8 minutes. Check it then; you can always cook it a little longer, but if it’s overcooked, there’s no going back!
Now, temperature control —a meat thermometer can be a chef’s best friend. cooking chicken to an internal temp of 165°f (75°c) is a must for safety.
If i could take a moment to brag about my perfect roast chicken, it had that crispy skin and was juicy inside.
All thanks to proper temperature!
Expert Techniques
Let’s dive into some expert techniques that can elevate your meal to michelin-star levels! first off, worry about the critical steps in the recipe.
Missing one can crumble the whole dish, like forgetting to bloom your spices. if you forget to sauté those spices first, you miss out on all that beautiful flavor.
Also, check for quality —always source fresh ingredients. have you ever had rubbery tomatoes? ugh! it’s like biting into a disappointment.
And remember to taste your food as you cook. not only does that help improve your dish, but it also confirms you’re on the right path!
Success Strategies
Last, let’s talk success strategies . if your dish doesn’t turn out right, don’t fret. troubleshooting tips are your friend. for instance, if your sauce turns out too salty, toss in some diced potatoes to absorb the excess.
Genius, right?
Quality assurance is all about doing a final check. just before you plate your fantastic creation, taste one last time.
If it sings, you’ve got a winner! but if not, think critically about what might help—maybe a splash of vinegar for brightness or some fresh herbs to elevate the flavor.
Oh, and before i go on to a different topic, remember that having a few cleaning hacks on hand never hurts, especially for those pesky gum stains.
Whether using the ice technique to freeze it off or a diy gum remover with vinegar, knowing these can save you.
Seriously, gum on fabric is the worst!
And speaking of cleaning, get ready; in the next section, i’ve got all the deets on how to tackle those sticky situations with easy, eco-friendly solutions.
Let’s keep the kitchen clean and happy, shall we?
Success Guaranteed Tips
Oh my gosh, let’s talk about gum removal for a second! we’ve all been there, right? you sit down to enjoy your favourite snacks, only to realize you’ve somehow ended up with gum stuck to your couch or shirt.
For this sticky situation, i’ve got some success guarantees that will help you tackle it like a pro!
Professional Insights
First off, you need to remember that timing is everything . the quicker you act, the better! gum gets stubborn when it has time to settle in, so be swift—grab those ice cubes! the ice technique for gum removal is a game-changer.
Expert Techniques
Now, let’s get to the nitty-gritty. i swear by the combination of vinegar cleaning solutions and a little oil to loosen the gum.
It’s like a culinary magic trick! you just mix equal parts vinegar and water, and it works wonders. who knew your kitchen staples could be so powerful, right?
Kitchen Wisdom
Remember, if you're dealing with delicate fabric, always test a small area first. the last thing you want is a disaster on your favourite outfit.
Trust me, i've learned this the hard way!
Success Guarantees
Follow these tips, and I promise—with a little patience—you’ll conquer those gum stains. Whether it’s your favorite hoodie or a cherished rug, you will prevail!
Perfect Presentation
Now that you're on your way to gum-free zones, let’s chat about how gorgeous your cleaned surfaces can look. A clean home is a happy home!
Plating Techniques
After you’ve removed that pesky gum, think presentation. For visible surfaces, a good wipe-down with a lemon-scented cleaner can brighten things up. Honestly, it feels like a mini makeover for your space!
Garnish Ideas
If you want to get fancy, add a little fresh herb or citrus peel to your cleaning solution. not only does it smell divine, but it also adds a nice touch to your cleaning routine.
It’s like giving your home a little hug.
Serving Suggestions
And when it comes to serving suggestions—after a thorough clean, consider sprucing up with a candle or fresh flowers. Your space will not just be gum-free; it’ll be welcoming, too!
Visual Appeal Tips
A clean surface is the canvas of your cozy abode. Take a moment to appreciate the beauty of a tidy room. Seriously, it can change your whole vibe!
Storage and Make-Ahead
Let’s be real, storage is essential when it comes to cleaning products. Here are some tips for keeping your DIY gum remover ready at your fingertips.
Storage Guidelines
To keep your cleaning solutions effective, store them in dark, cool spots. Sunlight can decrease their potency, and we don’t want that!
Preservation Methods
Mix only what you need for quick cleanups—this way, you can always have fresh solutions on hand without cluttering your space.
Reheating Instructions
Okay, so we’re not cooking here, but if your gum removal ingredient gets too warm, just chill it again. A quick trip to the freezer can do wonders.
Freshness Tips
For that freshness , try to use your vinegar and oil mixes within a month. They may lose their effectiveness over time.
Creative Variations
If you’re feeling adventurous, here are some creative variations to spice up your gum-removing game!
Flavor Adaptations
Did you know that you can mix essential oils into your cleaning solutions? citrus cleaning benefits are fab for cutting through that stickiness! a few drops of lemon essential oil will make your home smell like a sunny day.
Dietary Modifications
I mean, you could even try using peanut butter or coconut oil for tougher spots—while it may sound counterintuitive, these can help loosen up the gum if you have some lying around!
Seasonal Twists
Depending on the season, you can switch things up. Use pumpkin spice essential oil in the autumn or peppermint in the winter for that extra cozy vibe while you clean.
Regional Variations
And hey, don’t disregard local wisdom! Different cultures have unique cleaning hacks. So be open to trying new methods—who knows what might work best for you?
Complete Nutrition Guide
Now, I know what you might be thinking—this isn’t about food —but let’s discuss the basics of “nutrition” for your surfaces!
Detailed Breakdown
Using natural cleaning ingredients, like vinegar and essential oils, can actually enhance the health of your home environment. It’s eco-friendly and non-toxic!
Health Benefits
Cleaner surroundings lead to a healthier lifestyle. The fewer chemicals you have around, the better for your breathing and overall wellbeing.
Dietary Information
Even though we’re talking about cleaning, think of it as dieting for your home . You want it fresh, free of junk, and looking good!
Portion Guidance
Keep your cleaning solutions in small, manageable batches. A little goes a long way against tough gum stains!
Expert FAQ Solutions
Let’s wrap it up with some expert FAQs . Because honestly, who doesn’t have questions?
Common Concerns
“What if the gum is super tough?” No worries! Just apply a little heat—carefully, of course, not too close—to soften it.
Expert Answers
If you’re dealing with various surfaces, remember that multiple surface gum removal requires patience and the right technique.
Troubleshooting Guide
If at first you don’t succeed, try the ice technique for gum removal again. It really can make all the difference.
Success Tips
Always keep cleaning hacks handy! They make life simpler and ensure that sticky situations are short-lived.
In conclusion, the next time you find yourself defending the honor of your couch or that beloved pair of trousers, remember to channel your inner gum-removal ninja.
Armed with just a few household items and a sprinkle of patience, you can tackle any gum-related snafu life throws your way.
Happy cleaning, friends!
Chewing Gum Remover: Easy DIY Tips Card
⚖️ Ingredients:
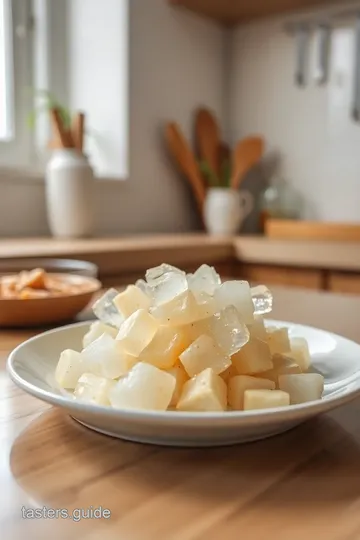
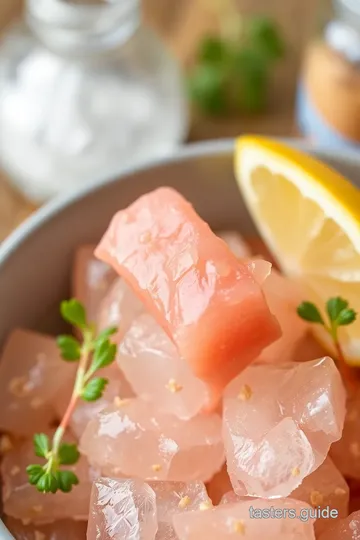
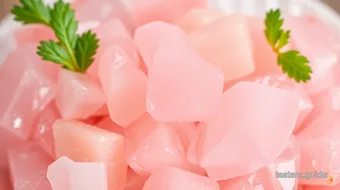
- 2-3 cups of ice (or enough to cover the gum)
- ½ cup white vinegar
- ½ cup water
- 1 tablespoon vegetable oil
- 1 tablespoon peanut butter (optional for extra stickiness)
🥄 Instructions:
- Step 1: Place ice in a plastic bag and apply it directly to the gum for 5-10 minutes to harden it.
- Step 2: Once hardened, gently peel the gum away from the surface. Use a spoon if necessary.
- Step 3: If any residue remains, dip a clean cloth into the vinegar solution (mix vinegar and water) and blot the area gently until clean.
- Step 4: If theres still some gum or stickiness left, apply a small amount of vegetable oil or peanut butter and massage it into the area.
- Step 5: Wipe the area clean with a cloth dampened in warm, soapy water to remove any oil residue.
Previous Recipe: Halloween drinks for adults with skulls: 5 Hauntingly Delicious Cocktails!
Next Recipe: Fruit Salad with Spinach and Croutons: Easy, Delicious & Refreshing Recipe!