DIY Candy Necklace Delight
Want to make your own candy necklace candy? This delightful DIY recipe brings back childhood memories and lets you customize flavors and colors! Let's get started!

Growing up, summer afternoons were filled with laughter, outdoor games, and, of course, candy necklace candy . oh my gosh, i remember the excitement of racing to the corner store, trading my allowance for those colorful, edible accessories.
They weren’t just a snack; they were a piece of art you could wear! makes you reminisce about those carefree childhood memories, right? if you’re ready for a little nostalgia, why not try making your own? today, i’m sharing a super fun diy candy necklace tutorial that's perfect for both kids and adults.
It’s not just another hobby; it’s about creating sweet memories .
Recipe Overview
The origins of the candy necklace date back to the late 1950s as a popular treat among kids. you could often find them at birthday parties or as candy party favors .
Fast forward to today, and these little beauties are making a delightful comeback! in a world bustling with technology, there’s something incredibly soothing about getting hands-on with some candy-making activities, right?
This recipe for homemade candy necklaces is a breeze. it requires minimal effort and only about 45 minutes of your time (with just 15 minutes of active prep!).
You don’t need any fancy culinary skills—just a bit of patience and creativity! plus, you’ll yield 4-6 colorful candy necklaces , perfect for sharing or for having a little candy design showdown with friends!
And let’s talk about costs. you’re looking at spending less than ten bucks for ingredients, making this not only a fun diy project but also an economical one.
Now, who doesn’t love a good deal, especially when it’s a sweet one?
Key Benefits
So why should you dive into this sugary crafting adventure? for starters, there are some fantastic health benefits. while we can’t deny that these candy necklaces are sugary, you get to control the ingredients! you can swap out alternatives for sugar, like using fruit-flavored candies, or even make a lower-sugar option using stevia.
Now that’s a win!
This recipe isn’t just about the end product; it’s about the journey. this combines creativity with a bit of food science fun .
It’s a perfect way to enrich your kitchen experience while teaching kids some hands-on cooking skills. you can call it creative cooking for kids ! plus, when you’ve created something fabulous, you can wear it, eat it, and share it (if you choose to!).
Worried about making the perfect treat for special occasions? these candy necklaces fit right in as edible jewelry for birthday parties, school events, or even as a unique way to decorate a dessert table.
Seriously, what’s cooler than candy that you can wear?
Ready for a little adventure? Let’s transition over to the ingredients section. You’re about to whip up a batch of fun recipes for kids that’s easy enough for everyone to join in on the fun!
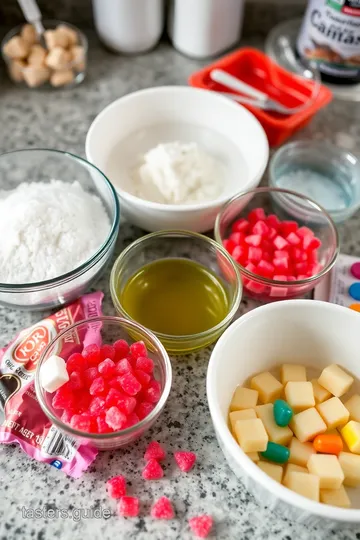
Ingredients
Now that we've got the exciting stuff out of the way, here are the ingredients you'll need for your DIY Candy Necklace Delight.
-
Candy Beads:
- 2 cups (200g) granulated sugar
- 1/2 cup (120ml) light corn syrup
- 1 cup (240ml) water
- 1 teaspoon flavor extract (you pick—vanilla, strawberry, or any fruit-flavored candies work!)
- Food coloring (gel for vibrant colors)
- 1/2 teaspoon citric acid (if you want a slightly tangy kick)
-
String:
- 24 inches (60cm) elastic stretch cord
- Scissors
Now, you're all set to dive into this colorful candy adventure! It’s going to be a blast! Let’s get those hands sticky and make some memories!
Your Ultimate Essential Ingredients Guide for DIY Candy Necklaces
Oh my gosh, let’s dive into something super fun that’ll spark your inner child! we’re talking about “ candy necklace candy ”—that sweet, playful edible jewelry that’s been giving us those warm, fuzzy childhood memories since the '50s.
Remember how cool it felt to wear your candy? well, i’m here to help you not just wear it but make it with your own two hands! so, let’s break down the essential ingredients, tools, and tips so you can start crafting your colorful candy creations today.
Premium Core Components
First up, let’s talk premium core components. You want high-quality ingredients for that sweet edible accessory .
-
Granulated Sugar : You need 2 cups (200g) for that perfect, sugary sweetness. Check for a fine texture—no clumps!
-
Light Corn Syrup : Measure 1/2 cup (120ml) . Look for a clear syrup; the fresher, the better. This helps your candy hold that chewy goodness.
-
Flavor Extract : Just 1 teaspoon ! I’m all about vanilla or strawberry, but go wild; try them all! Smell those bottles—fragrance indicates freshness.
-
Food Coloring : Get yourself some gel coloring. A little goes a long way and keeps the texture intact.
-
Citric Acid : Optional, but if you want a tart twist, use 1/2 teaspoon . Smell it; that zingy scent means it’s good to go!
Storage : Keep dry ingredients in airtight containers. Enjoy them within 6 months for optimal taste.
Signature Seasoning Blend
Now, if you’re feeling adventurous, let’s jazz up your diy experience with a signature seasoning blend ! the beauty of homemade candy necklaces is that you can mix and match flavors and colors.
Think about pairing herbs or natural food extracts. ever tried basil extract? sounds weird, right? but it could create a funky flavor that surprises your taste buds.
Plus, seasonal fruit-flavored candies? yes, please! you could even have a peppermint candy version for holiday cheer!
Smart Substitutions
Don't fret if you’re missing an ingredient! Often you can find common alternatives . If you find yourself out of corn syrup, go for maple syrup. Not as sweet, but still yummy!
For those watching sugar levels, swap regular granulated sugar for a sugar substitute like stevia or xylitol.
And when an ingredient doesn’t appear in your pantry, trust your instincts on what could work. How about pureeing fruit for natural sweetness instead of processed sugar?
Kitchen Equipment Essentials
Must-Have Tools
- Saucepan : Big enough to stir all your ingredients.
- Candy Thermometer : If you’ve got one, great! But if you don’t, the cold-water test (dropping sugar into cold water to check for firmness) works just fine.
- Piping Bags : If you’re fancy, but honestly, a sandwich bag snipped at the corner works like a charm for piping your candy beads. Just keep it simple!
Wrap Up and Get Crafting!
There you have it, folks—a full essential ingredients guide to make your own candy necklaces! from gathering premium ingredients to mastering the piping technique, you're all set to embark on this playful journey of creativity.
And hey, don’t forget to have fun while doing it! these fun recipes for kids (and even for adults who want to get crafty) are perfect for a rainy day or just some quality time together.
So, buckle up; your diy candy necklace adventure is about to take off! in the next section, i’ll walk you through the easy-to-follow steps so you can start crafting and enjoying those tasty, colorful candy ideas right in your kitchen! trust me, it’s even sweeter when you get the kids involved.
They’ll love the sensory play with food —not only due to the candy design , but the entire process of creating their own edible party decorations!
Unleashing Your Inner Candy Creator: The Professional Cooking Method
Alright, friends! let’s talk about something super fun today: making your own candy necklace ! you remember those colorful, sugar-filled wonders from childhood, right? well, assembling these sweet edible accessories is not only a treat to wear but also a fantastic diy candy craft you can tackle with the fam.
So, pull up a chair, and let's dive into the pro-level cooking methods to make this nostalgic delight!
Essential Prep Steps
Before you dive headfirst into candy-making madness, let’s chat about mise en place . yup, that fancy french term just means having everything ready.
Measure out 2 cups of sugar, 1/2 cup corn syrup, and 1 cup of water. pop your flavor extracts and food coloring nearby too.
Trust me; you don’t want to scramble for stuff once the sugar starts bubbling!
Time Management Tips
Candy-making isn’t just about throwing things together. it’s all about timing and organization. keep an eye on that pot! once you’ve poured your ingredients in, it’s time to watch it like a hawk.
It might boil over if you look away for just a second!
Safety Considerations
Okay, real talk—sugar gets super hot. we’re talking 300° f ( 150° c) , and that’s no joke! so, while you’re working, make sure you have a pair of mitts and keep the kiddos at a safe distance from the stove.
Hot sugar syrup can burn faster than you can say “candy necklace candy!”
Step-by-Step Process
-
Preparing Your Surface: Get some parchment paper or a non-stick mat ready. This is where the magic happens!
-
Combining Ingredients: In a saucepan, whisk together 2 cups of sugar, 1/2 cup corn syrup, and 1 cup of water.
-
Cooking the Mixture: Heat over medium until it starts to boil. Keep stirring occasionally. Yup, patience is key!
-
Taking It to 300° F ( 150° C): Let’s get it to hard crack stage. This is when it gets all crunchy goodness, perfect for our beads.
-
Flavor and color: once it’s done, take it off the heat and mix in your flavor extract and gel food coloring.
Go wild with the colors; this is where the fun really pops!
-
Piping Beads: Here’s the tricky part. Get your piping bag ready and pipe small circles onto your prepared surface. Move quickly, or it will harden, and we don’t want that!
-
Assembling Your Necklace: Cut your elastic string to about 24 inches . Carefully thread those colorful beads onto the cord. Tie it off, and boom! You’ve got yourself an edible masterpiece.
Success Strategies
Avoid those common hiccups while making your candy necklace. one crucial tip? don’t rush when piping those beads. and if they start setting too fast, just place the saucepan back on the stove for a moment to reheat.
Quality Checkpoints
As you check your beads—make sure they’re shiny and bright. If they look dull, maybe they didn’t reach that magic hard crack point.
Expert Techniques
With all this candy-making in mind, let’s not forget to have fun! try piping different shapes beyond the classic bead.
Think stars, hearts, or whatever floats your boat! you can even play with flavors too—how about some fruity fun?
Make-Ahead Options
Want to make these candy necklaces ahead of time? totally doable! just store them in an airtight container to keep them fresh for your next candy party or as unique diy candy gifts.
They’re also perfect as party favors.
Get crafty and whip up a wild batch of homemade candy necklaces ! you’ll be blending sweet fruity flavors while tapping into those nostalgic childhood memories .
Plus, working with sugar is practically food science fun —it’s a perfect combo of creativity and kitchen skills!
So there you have it, pals! you’re now equipped with everything you need to succeed in the world of candy design.
Keep those colorful ideas flowing, and get ready to savor those sweet vibes!
Stay tuned for more tips and tricks on candy-making adventures! Next, we'll dive into some additional information on flavors and techniques. Trust me; you won’t want to miss it!
Unwrap the Sweet Fun: Additional Recipe Information for Your DIY Candy Necklace Delight
Pro Tips & Secrets
Alright, let’s dive into the juicy bits of crafting your very own candy necklace candy ! first off, work quickly .
Trust me; candy sets faster than you can say “sugar rush.” once it’s in the piping bags, you better be ready to pipe those beads out.
If you wait too long, you'll turn that hot sugar syrup into a solid block—so no pressure!
Now, about flavor: don’t be shy! mix and match extracts for a personalized touch. almond and coconut? yes, please. and if you want a twist, add a bit of citric acid for a zing that'll make your taste buds dance.
Seriously, it’s like a party in your mouth!
For presentation , remember that vibrant colors are your best friends. use gel food coloring to achieve those exciting hues.
They make your edible jewelry look as good as it tastes! one last secret? pipe them in shapes other than beads! stars or hearts? now that’s a blast.
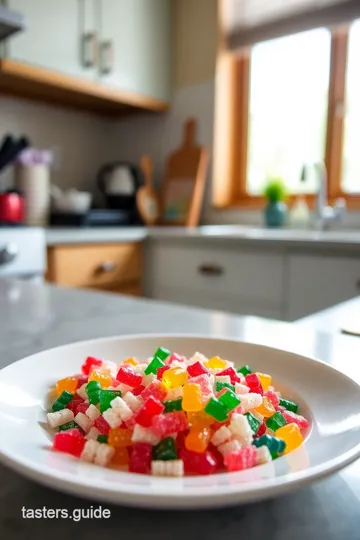
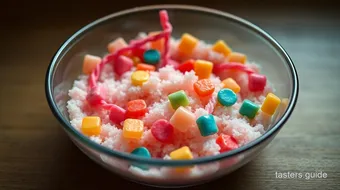
Perfect Presentation
Let’s talk about how to wow your friends (and yourself!) when it comes to plating . you know how a dish looks can totally affect how it tastes, right? for those candy necklaces, arrange them on a bright plate.
Add some colorful fruit slices around—think strawberries and kiwis for that pop! you’ll have a visually stunning treat that draws everyone in.
And don’t forget the garnish ! a sprinkle of powdered sugar can add a little flair and make it look fancy, even though it’s just a fun snack.
Remember, the more colors you use, the better it looks!
Storage & Make-Ahead
Now, if you’re planning a candy party (or just want to stock up for the week), here’s how to store those beauties.
Keep your homemade candy necklaces in an airtight container at room temperature. seriously, they should last about a week, but let’s be real—good luck with that!
When it comes to reheating , you don't really need to; these bad boys are best fresh. if they’ve hardened a bit, pop them in a warm place for a few minutes to soften up.
You want them to be easy candy recipes that everyone wants to grab!
Creative Variations
Who says you can’t switch things up? with your candy necklace tutorial , go wild! how about fruit-flavored candies ? use different flavor extracts to truly cater to your crew.
If you’ve got specific dietary needs in mind, swap out regular sugar for something like stevia. voila! a guilt-free pleasure.
Feeling adventurous? Add some seasonal fruit flavors during summer, or spice things up with pumpkin spice extract in fall. The world is your oyster—or should I say, your candy necklace!
Complete Nutrition Guide
So, let’s address the sweet elephant in the room—nutrition. each candy necklace is about 120 calories . low in fat and protein but packed with that glorious sugar rush we all love.
Moderation, though, sweet friends! enjoy these as part of a balanced diet.
It’s also worth noting: if you’re craving some fun recipes for kids , these are a fantastic way to engage the little ones in creative cooking .
They can decorate their necklaces and pick flavors, turning a cooking session into a fun food craft !
Expert FAQ Solutions
Got questions? i got answers! one of the most common? “why did my candy not turn into beads?” honey, that might’ve been too cold or not hot enough when you piped it.
Stick with the heat and ensure you’re hitting that hard crack stage.
If your candy beads are sticking together, sprinkle some granulated sugar or cornstarch in between. It acts like magic!
Conclusion
There you have it—everything you need for a diy candy necklace adventure! whether you're crafting with kids, looking for a walk down nostalgic candies lane, or trying your hand at some neat diy candy gifts , this recipe is totally your ticket.
Remember, the kitchen should be fun and messy! these candy necklaces aren’t just about eating; they’re about making memories. so grab those supplies, channel your inner kid, and let’s create some edible magic!

DIY Candy Necklace Delight Card
⚖️ Ingredients:
- 2 cups (200g) granulated sugar
- 1/2 cup (120ml) light corn syrup
- 1 cup (240ml) water
- 1 teaspoon flavor extract (vanilla, strawberry, etc.)
- Food coloring (gel preferred for vibrant colors)
- 1/2 teaspoon citric acid (optional for a tangy taste)
- 24 inches (60cm) of elastic stretch cord
- Scissors
🥄 Instructions:
- Step 1: Line a baking sheet with parchment paper or a silicone mat.
- Step 2: In a saucepan, combine sugar, corn syrup, and water. Whisk until blended.
- Step 3: Heat the mixture over medium heat until it reaches a boil, stirring occasionally.
- Step 4: Allow it to cook until it reaches 300°F (150°C) or until it forms hard crack stage.
- Step 5: Remove from heat. Stir in flavor extract and food coloring to desired shade.
- Step 6: Quickly transfer the mixture into piping bags. Cut the tip and pipe small, bead-sized circles onto the prepared surface.
- Step 7: Allow the candy beads to cool completely.
- Step 8: Cut the elastic cord to your desired length. Thread the candy beads onto the cord, creating your necklace.
- Step 9: Tie the ends of the cord tightly to secure the beads.
Previous Recipe: Ultimate Mother's Day Gift Set: 5 Delicious Homemade Treats
Next Recipe: How to Create a Warm Soup Care Package: My Grandma's Classic Veggie Delight