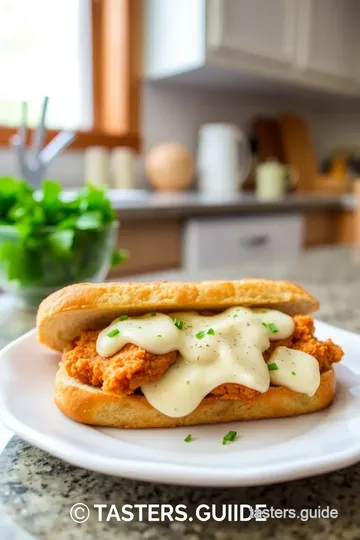
Fried Chicken Asiago Sandwich
Craving a fantastic sandwich? Try my Fried Chicken Asiago Sandwich - Irresistibly Good! It's crispy, cheesy, and perfect for every comfort food lover.

- Fried Chicken Asiago Sandwich - Irresistibly Good
- Essential Ingredients Guide for Your Fried Chicken Asiago Sandwich - Irresistibly Good
- Professional Cooking Method to Master the Fried Chicken Asiago Sandwich
- Pro Tips & Secrets
- Perfect Presentation
- Storage & Make-Ahead
- Creative Variations
- Complete Nutrition Guide
- Frequently Asked Questions
- Recipe Card
Fried Chicken Asiago Sandwich - Irresistibly Good
What’s the Deal with Fried Chicken Asiago?
So, here’s a fun memory! a couple of years back, i found myself craving something special after a long week.
You know, that kind of hunger for comfort food that just hits different? one of my go-to's? a fried chicken asiago sandwich .
Oh my gosh, the sound of crispy fried chicken paired with that nutty, rich asiago cheese just sends me over the moon! if you’ve been hunting for a meal that’s simultaneously comforting, cheesy, and downright irresistibly good , you’re in the right place.
Since we’re talking about a southern style sandwich with a twist, it’s worth diving into this recipe enveloped in crispy goodness and packed with flavor.
Believe me, once you take a bite, you’ll understand why it’s become a staple in many homes across america!
A Quick Look at the Recipe
Let’s go back in time for a second. fried chicken is not just any dish; it’s deeply rooted in southern tradition.
Imagine folks gathering after church on a sunday, with golden-brown fried chicken filling the table! this gourmet sandwich recipe elevates that classic to a whole new level by adding creamy asiago cheese and that zingy spicy mayo.
In today’s fast-paced world, this chicken sandwich checks all the boxes. it takes about 1 hour from start to finish, perfect for a quick dinner idea that looks and tastes fancy.
The frying technique itself? medium difficulty. but don’t let that scare you off; the deliciousness is worth the little bit of effort!
What’s So Great About This Recipe?
Okay, let’s talk benefits because this sandwich is not just a pretty face. first off, you’ve got that crunchy, delectable fried chicken, which is not just comforting, it’s protein-packed! that asiago cheese? it adds a depth of flavor that regular cheese just can’t compete with.
Plus, the homemade spicy mayo (totally customizable, by the way) brings an extra punch to each bite. this isn’t just any chicken sandwich variation ; it’s a full-on flavor explosion!
Want to impress at a cookout or family gathering? this sandwich is perfect ! it's an ideal choice for saturdays spent grilling or casual weeknight dinners.
You can even prep those juicy chicken thighs ahead of time and whip up a few extra servings for meal prep.
Talk about convenience!
More Reasons to Love It
Aside from being a head-turner in the sandwich department, this fried chicken asiago sandwich brings a touch of gourmet to your plate, without the price tag of a fancy restaurant.
Not into frying? well, don’t worry! there are healthy frying methods that keep it crispy without soaking in too much oil.
And let’s be honest, there's nothing quite like biting into that first mouthful and hearing that crunch. it’s scenic comfort food at its best!
This feast pairs deliciously with crunchy coleslaw recipes or even crispy sweet potato fries for that restaurant-style vibe at home.
Plus, if you're feeling adventurous, you can switch up the toppings to make it your own. maybe add some extra herbs or change up your sauces—it’s your kitchen, your rules!
Now that you’ve got your taste buds tingling, let’s dive into the ingredients you’ll need to create this mouthwatering creation.
Trust me, your friends and family will thank you once they dig in!

Essential Ingredients Guide for Your Fried Chicken Asiago Sandwich - Irresistibly Good
Get ready because we’re diving deep into the essentials for crafting the ultimate fried chicken asiago sandwich - irresistibly good ! whether you're aiming for a crispy fried chicken sandwich that is loaded with flavor or just trying to whip up a gourmet sandwich recipe that your fam will rave about, having the right base ingredients is key.
So, let's break it down!
Premium Core Components
First things first, you need to gather the premium ingredients. Here’s what’s critical:
-
Quality indicators: when selecting chicken, make sure it’s fresh and feels firm. opt for boneless, skinless chicken thighs over breasts if you like a juicier bite.
Look for asiago cheese that smells nutty and has a slightly crumbly texture—that’s a sign it's top-notch.
-
Measurements: For U.S. and Metric lovers, here are the essentials for our chicken: 1 pound (450g) of chicken, 1 cup (120g) flour, and so on. Keep it simple, right?
-
Storage guidelines: store any leftover asiago cheese wrapped tightly in wax paper or cheese wrap, and keep it in the fridge for up to 2 weeks.
As for chicken? use it within 2 days or freeze it for later.
-
Freshness Tips: When shopping for greens, make sure they’re vibrant—no wilting, please! Also, always check that your spices haven’t expired. Fresh spices can make or break your Southern-style sandwich .
Signature Seasoning Blend
Next up, let’s talk about flavor. Signature seasonings are what elevate this sandwich from basic to totally mouthwatering .
-
Essential Spice Combinations: You’ll need smoked paprika and garlic powder to pack that spicy punch! A simple sprinkle of black pepper and a pinch of salt goes a long way.
-
Herb Selections: Think about adding fresh herbs! Basil or parsley sprinkled on top adds a nice pop of freshness that perfectly complements your fried chicken recipe .
-
Flavor Enhancers: Don’t forget the spicy mayonnaise sauce ! This zesty condiment ties everything together. It’s like giving your sandwich a hug!
-
Regional Variations: Feel free to shake things up with some hot sauce if you're craving heat, or even barbecue sauce if you're feeling a bit saucy (pun intended)!
Smart Substitutions
Now, life’s unpredictable. What if you’re missing something? No sweat!
-
Common Alternatives: You can use gluten-free breadcrumbs if needed or swap out Asiago for Parmesan —it works surprisingly well too!
-
Dietary Modifications: If you’re keeping it healthy, go for baked chicken instead of fried. You’ll still get that crunch by using a panko breadcrumb coating!
-
Emergency Replacements: In a pinch? Greek yogurt can work in place of mayo for a lighter touch.
-
Seasonal Options: Love summer flavors? Add sliced cucumber or peaches when you're assembling your chicken sandwich toppings for a refreshing twist.
Kitchen Equipment Essentials
You gotta have the right tools to work your magic.
-
Must-have tools: a deep frying pan or dutch oven is essential for frying the chicken evenly. a cooking thermometer is also a lifesaver to ensure that perfect frying temperature— 165° f ( 74° c) for that safe zone.
-
Alternative Equipment: If you don’t have a fryer, a regular skillet works fine. Just watch your oil level and heat carefully!
-
Preparation Tips: Use tongs for handling the chicken. Believe me, trying to flip it with a fork could lead to disaster.
-
Storage Solutions: Store your chicken after frying on paper towels to absorb excess oil—no soggy sandwiches on my watch!
With all these ingredients and tips in hand, you’re ready to dive into crafting the Fried Chicken Asiago Sandwich - Irresistibly Good ! Let’s move on to the juicy stuff—the step-by-step instructions so you can create something that will have your family asking for seconds! Get those frying pans hot!
Professional Cooking Method to Master the Fried Chicken Asiago Sandwich
Getting into the groove of professional cooking isn’t just about the skills; it’s about that delightful combination of practice, precision, and a little tlc.
Whether you’re a kitchen newbie or a side-dish aficionado, let’s explore some killer techniques to whip up that fried chicken asiago sandwich - irresistibly good .
This isn’t just any crispy fried chicken sandwich; it’s southern-style sandwich heaven, topped with creamy asiago cheese and a spicy mayo that’ll knock your socks off!
Essential Preparation Steps
Before we dive into the frying frenzy, let’s talk mise en place . that french term just means having your ingredients prepped and ready to rock.
Chop those tomatoes, measure out your spices, and whisk that buttermilk and egg combo. a well-organized kitchen is a happy kitchen! oh, and don’t forget your creepy cousin—safety! when frying, always keep fresh paper towels and a pair of heat-resistant gloves handy.
Time management? absolutely key. i swear, nothing throws me off like scrambling to find an ingredient mid-cook. aim to prep for about 15 minutes and let that chicken chill for 30 minutes to build flavor.
Speaking of chilling, keeping the batter cold before frying gives you that extra crunch.
Step-by-Step Process
- Ready the Chicken : Season 1 pound of boneless chicken thighs with spices, cause flavor is life!
- Dredge Like a Pro : Dip that chicken first in the flour, then the egg, and back to the breadcrumbs for that killer panko breadcrumb coating .
- Chillin’ Like a Villain : Let it chill for 30 minutes . It’s like a little spa day for your chicken.
- Let’s Fry : Heat oil in your pan to 350° F ( 175° C) . Once hot, introduce the chicken, frying for 5- 7 minutes per side until golden brown. Trust , and make sure to check that the internal temp hits 165° F ( 74° C) .
- Cheesy Goodness : Add that Asiago cheese in the last minute—oh boy, it’s like a warm hug!
- Saucy Business : Mix mayo with Sriracha and lemon juice for a zesty homemade spicy condiment that’ll make your taste buds sing!
Expert Techniques
Okay, here’s where the magic happens. learning how to troubleshoot during cooking is crucial. maybe your chicken isn’t coming out as crispy as you imagined? a tip? double-dip your chicken in the flour and eggs—it’s a game changer for that crunch.
And remember, if the oil temperature drops when adding chicken, the breading can become soggy. keep it consistent!
Quality checkpoints are also a must. Check not only for doneness but also for that golden brown color that screams “fried chicken perfection.”
Success Strategies
Listen up! even the pros make mistakes. one common blunder is overcrowding your frying pan. give your chicken breathing room to ensure that perfect frying temperature and crispiness.
Also, always let fried chicken rest on paper towels after cooking; it absorbs any excess oil, which keeps your final masterpiece from being greasy.
If you really want to get ahead, consider meal prep chicken recipes. brining your chicken overnight can add epic juiciness.
Pair that brined chicken with some homemade coleslaw recipes or sweet potato fries, and you have yourself a quick dinner idea that everyone will love.
Putting It All Together
Making a fried chicken asiago sandwich isn’t just about putting chicken in a bun; it’s about crafting an experience. each bite is an explosion of crunchy, creamy goodness, from the crispy fried chicken to the rich asiago cheese and the zingy spicy mayo.
This isn’t just comfort food; it’s a celebration of flavors.
So, whether you are having a casual family dinner or trying to impress a crowd, this gourmet sandwich recipe is bound to become one of your favorite sandwich shop favorites .
Get ready to dive into that irresistible world of flavors—your taste buds will thank you!
Stay tuned for the next section where we'll delve deeper into Additional Information... about variations, tips, and tricks to customize your chicken sandwich!
Pro Tips & Secrets
Alright, let’s get down to some pro tips for making this fried chicken asiago sandwich - irresistibly good . first off, take your time during the brining process.
If you soak your chicken in a saltwater brine for at least an hour, you'll end up with that juicy, tender chicken that makes bites sing.
It's a secret i learned the hard way—nobody likes dry chicken!
Now, for the frying part, temperature control is key . keep that oil hot—around 350° f ( 175° c) is perfect for achieving that crispy fried chicken sandwich magic.
Overcrowding the pan can drop the oil temp, leading to soggy chicken. and who wants that?
When you bread the chicken, try double dredging it. dip, coat, dip again, and then roll in those panko breadcrumbs.
The double layer creates a crunch so good, it'll make you want to throw a parade for your fried chicken.
Lastly, if you're feeling fancy, sprinkle some fresh herbs into your breadcrumb mix. I mean, why not treat your taste buds to all that flavor?
Perfect Presentation
Let’s talk about how to make this sandwich look like it jumped straight out of a restaurant menu. if you want a gourmet sandwich recipe , plating is everything.
Layer your greens first on the bun, followed by that golden piece of chicken, and then sprinkle a bit of grated asiago cheese on top.
Garnish it with a touch of fresh herbs for that pop of color—maybe some basil or parsley? seriously, the colors make a difference.
You want greens, yellows, and browns on that plate! and if you want to go the extra mile, drizzle a bit of spicy mayo over the top to ooze down the sides.
Trust me, it’s all about the visual appeal.
Storage & Make-Ahead
So, you nailed the sandwich but aren’t gobbling it down right away? no worries! storage guidelines are pretty straightforward. you can keep the chicken in an airtight container in the fridge for up to 3 days .
When it’s time to reheat, toss it in the oven at 375° f ( 190° c) for about 10- 15 minutes.
This keeps that crispy texture intact.
If you're all about that meal prep life, you can assemble the sandwiches ahead of time. just diy the spicy mayo as well, and store it separately so you don’t end up with a soggy sandwich.
You’ll be all set for quick dinner ideas during the week!
Creative Variations
Let’s get weird with it! the chicken sandwich variations are endless. if you want a kick, try adding hot honey to the mayo or swapping out the asiago for a pepper jack for that spicy flavor.
You can even switch it up seasonally. when summer rolls around, go for a slice of ripe tomato and maybe a sprinkle of avocado.
Hello, flavors!
For those following a gluten-free diet, gluten-free breading can work wonders. just grab some rice flour and gluten-free breadcrumbs, and you’re golden.
And if you’re feeling adventurous, what about a southern-style twist with pickles? so good!
Complete Nutrition Guide
Now, let’s break it down a bit. this sandwich packs a punch with about 600 calories per serving . is that a lot? maybe.
But what it brings in flavor is worth it. plus, with 30g of protein from that juicy chicken, it's a comforting meal that fills you up.
As for health benefits, this dish allows for plenty of nutritious toppings. load it up with greens for fiber, and those sweet potato fries on the side are a solid choice because they’re lower in calories than regular fries and packed with vitamins.
Just remember to balance it out and enjoy in moderation—your tummy will thank you!
So go ahead, gather your ingredients, and treat yourself to this fried chicken asiago sandwich - irresistibly good . you’re not just whipping up a sandwich; you’re creating a beautiful explosion of flavor and comfort food that’ll make everyone at the table smile.
Happy cooking!
Frequently Asked Questions
What makes the Fried Chicken Asiago Sandwich - Irresistibly Good?
The combination of crispy fried chicken and melted Asiago cheese creates a unique flavor profile that balances crunch, richness, and a hint of spiciness from the homemade mayo. This delightful mix elevates a traditional favorite into something truly gourmet!
Can I make the Fried Chicken Asiago Sandwich ahead of time?
Yes! You can prepare the chicken, bread it, and store it in the fridge for up to 24 hours before frying. Alternatively, you can fry the chicken, let it cool, and store it in an airtight container in the fridge. When ready to serve, simply reheat in an oven to maintain the crispiness.
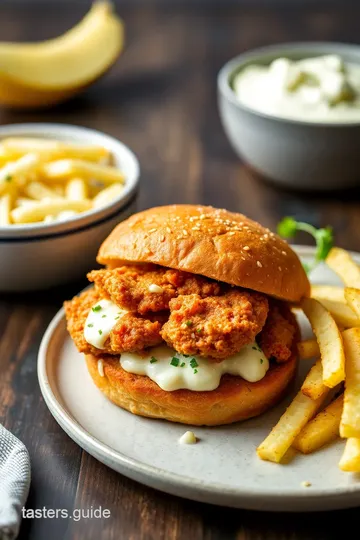
What are some good side dishes to serve with my Fried Chicken Asiago Sandwich?
Fried Chicken Asiago Sandwich pairs well with crispy sweet potato fries, a fresh garden salad, or a tangy coleslaw. These sides complement the sandwich's rich flavors and add a refreshing contrast to your meal.
How should I store leftovers from the Fried Chicken Asiago Sandwich?
Store any leftover fried chicken in an airtight container in the refrigerator for up to 3 days. To retain its texture, reheat in the oven at a low temperature until heated through, instead of microwaving.
Can I make the Fried Chicken Asiago Sandwich healthier?
Absolutely! You can use skinless chicken breasts, whole wheat buns, and reduce the amount of mayonnaise in the spicy mayo. Additionally, baking the chicken instead of frying it is a healthier option that still tastes delicious, though it may lack the same crunch.
What variations can I try with this Fried Chicken Asiago Sandwich recipe?
There are plenty of ways to customize this sandwich! Try adding avocado or bacon for extra richness, switch to gluten-free breadcrumbs for a gluten-free option, or use different cheeses such as gouda or pepper jack for varying flavors. You can also experiment with different sauces to enhance the taste.
Fried Chicken Asiago Sandwich Card

⚖️ Ingredients:
- 1 pound boneless, skinless chicken thighs or breasts
- 1 teaspoon salt
- ½ teaspoon black pepper
- 1 teaspoon garlic powder
- 1 teaspoon smoked paprika
- 1 cup all-purpose flour
- 2 large eggs
- 1 cup buttermilk
- 1¼ cups breadcrumbs (preferably panko)
- Oil for frying
- 4 ounces Asiago cheese, grated
- ½ cup mayonnaise
- 1 tablespoon Sriracha
- 1 teaspoon lemon juice
- 4 hamburger buns
- Leafy greens, like lettuce or arugula
- Sliced tomatoes (optional)
🥄 Instructions:
- Step 1: Season the chicken with salt, pepper, garlic powder, and smoked paprika.
- Step 2: In a separate bowl, whisk together eggs and buttermilk.
- Step 3: Dip each piece of seasoned chicken into the eggs, then coat in flour, back into the eggs again, and finally cover with breadcrumbs.
- Step 4: Place breaded chicken on a baking sheet and chill in the fridge for 30 minutes.
- Step 5: In a deep frying pan, heat oil over medium-high heat until it reaches 350°F (175°C).
- Step 6: Fry the chicken in batches until golden brown and cooked through (about 5-7 minutes per side).
- Step 7: In the last minute of frying, sprinkle grated Asiago cheese on top of each piece of chicken; let it melt slightly.
- Step 8: In a small bowl, combine mayonnaise, Sriracha, and lemon juice; mix well.
- Step 9: Spread spicy mayo on the bottom half of each bun, add fried chicken, top with greens and tomatoes, and finish with the bun top.
Previous Recipe: How to Bake Mozzarella Cheese Delightfully Yummy: My Easy Secret
Next Recipe: How to Create Quick Egg Roll Mustard Bliss: A Deliciously Easy Snack!