Milk Glass Vases: Charming Centerpieces for Every Occasion
Looking to add a personal touch to your decor? Discover my favorite tips for crafting milk glass vases, ideal for fresh flower displays and home styling.

- Milk Glass Vases: A Touch of Vintage Charm to Your Decor
- A Little look into into the Past
- Dollar Signs and Yields
- Why You’ll Love Making Milk Glass Vases
- Decorating with Milk Glass Vases
- Unlocking the Essentials: Your Guide to Kitchen Must-Haves
- Create Charming Milk Glass Vases: The Art of Elegant Centerpieces
- Additional Recipe Information
- Recipe Card
Milk Glass Vases: A Touch of Vintage Charm to Your Decor
You ever stumble upon something that just takes you back in time? i remember visiting my grandma's house and seeing those vintage milk glass pieces displayed proudly on her shelves.
It felt like stepping into a scene from a victorian novel. oh my gosh, i was totally captivated! fast forward to today, and i’ve fallen head over heels for milk glass vases , and honestly, i think you will too.
They’re perfect for displaying fresh flowers or just adding that magical touch to your home decor.
A Little look into into the Past
Milk glass isn't just a fancy name—it’s a whole vibe! originating back in the victorian era, this opalescent decor was all the rage.
It’s known for its gorgeous white hue, which looks stunning in any setting. fast forward to now, and guess what? people are still fawning over it! these vases are not just for your grandma; they’ve become major staples in modern homes, adding elegance without breaking the bank.
Creating your own milk glass vases is a fun diy project that falls somewhere in the medium difficulty zone. with some basic crafting techniques, you’ll impress your friends and family with your newfound flower arrangement skills .
Plus, it only takes about 20 minutes to whip them up. so, if you're looking for easy diy crafts to freshen up your home, keep this project in your back pocket!
Dollar Signs and Yields
Now, let’s talk about costs. one of the coolest things about making your own milk glass vases is how wallet-friendly it is.
Most of the materials—like glass jars, milk, and some dish soap—are super easy to get and won’t set you back too much.
Depending on how big you go with it, you could end up making 3 to 5 vases . you know, perfect for sprucing up your table or gifting to friends for housewarming parties!
Why You’ll Love Making Milk Glass Vases
Creating milk glass vases doesn’t just give you pretty decor; it has tons of health benefits and unique selling points too! fresh flowers not only brighten up your space but also improve air quality.
They add a bit of an oasis right in your living room! plus, being eco-friendly is a bonus! you’re making your home look gorgeous while utilizing jars that might otherwise collect dust.
These vases are perfect for all types of occasions—think weddings, holidays, or just jazzing things up for your tuesday taco night (because why not?).
That personal touch makes it extra special. you can even take it up a notch for those special events by incorporating seasonal flower displays.
There’s something about that rustic decor that brings warmth to any gathering!
Decorating with Milk Glass Vases
When it comes to using your milk glass vases, the sky’s the limit! you can keep things simple with fresh flower displays or mix it up by creating diy wedding centerpieces .
Another fun idea? use them as home centerpieces and watch how they instantly elevate your table setting inspiration. you could even play around with some floral foam techniques and try out different arrangements or colors that suit the season.
Just think about the transformations that can happen in your living space. from decorative milk glass pieces to unique accents, each arrangement is a chance to showcase your creativity.
And let’s be real, who doesn’t love a good conversation starter?
Ready to dive into this delightful diy project? let’s gather our materials and prep those vases! in the next section, i’ll break down what you need to get started.
I promise you’ll be amazed at what you can create when you combine a bit of crafting skill and the magic of flowers!
Unlocking the Essentials: Your Guide to Kitchen Must-Haves
So, you wanna level up your kitchen game? great! let’s get into the nitty-gritty of what you really need to whip up delicious meals and craft beautiful home accents like milk glass vases for your dining table! seriously—you can impress your guests with stunning decor and amazing meals at the same time.
Sound good? let’s roll!
Premium Core Components: What You Need to Get Started
First off, let’s talk about the premium core components . You gotta have tools that are gonna make your life easier.
When it comes to detailed measurements , grab a reliable set of measuring cups (both standard US and metric). It makes a world of difference. We're talking about precision here, folks!
Now, what about quality indicators for ingredients? For instance, when selecting fresh herbs, look for vibrant colors and fragrant scents. Wilted or brownish bits? No thanks!
For storage guidelines and shelf life , know that spices can lose their kick over time. Best to store them in a cool, dark place. And always check those expiration dates!
Lastly, let's not forget freshness tips . for any greens, think about keeping them wrapped in a damp paper towel in the fridge.
They’ll last longer, and then you can use them for those creative flower arrangements we keep talking about!
Signature Seasoning Blend: Spice Up Your Life
Moving on to signature seasoning blends ! having a well-rounded spice collection is a must. a basic mix might include garlic powder, smoked paprika, and maybe a touch of cayenne for heat.
Here’s a tip: experiment with local herbs or spices to create a flavor profile that screams your kitchen.
Don’t forget about your herb selections! Fresh herbs, like basil or cilantro, can totally elevate your cooking. Pair them wisely—mint and lemon is like a match made in heaven.
And let's jazz it up with some flavor enhancers . Think about using aromatics like onions, garlic, and ginger to lay the foundation of your dishes. They make everything pop!
Smart Substitutions: Flexibility is Key
Next up, we gotta talk smart substitutions . ever run out of an ingredient halfway through a recipe? ugh, right? fear not! for example, if you’re out of buttermilk, just mix milk with a little vinegar.
It works like a charm!
Make sure you also consider dietary modifications . Gluten-free flour blends can replace regular flour without missing a beat. Trust me, your gluten-free pals will appreciate it!
Or, y’know, if it’s a last-minute scramble, consider those emergency replacements . running low on butter? coconut oil can swoop in to save the day.
Just like your trusty milk glass decor , it’s all about finding versatility.
Kitchen Equipment Essentials: The Right Tools
Okay, now let's chat kitchen equipment essentials . First things first, the must-haves like a good chef's knife and cutting board can make or break your prep time. Don’t skimp there!
If you find yourself working with limited space, consider alternative equipment options . A quality paring knife can do the heavy lifting in a tight situation.
Need some preparation tips ? Try batch cooking! Prepping veggies or sauces on a Sunday can save you loads of time during busier weeknights.
And let’s not forget about storage solutions . Airtight containers are your best friends. They keep everything fresh and are great for those leftover herbs you want to save for your next DIY flower arrangements!
Wrapping It Up
All these elements play a role in crafting both delightful dishes and unique home accents, like those stunning, opalescent milk glass vases i keep going on about! when you combine your knowledge of essential ingredients and smart substitutions with the right tools, your cooking confidence can soar.
Whether you're hosting a dinner party or setting the scene for a special occasion decor , these tips will have you feeling like a pro.
When you're ready to dive into the hands-on part, check out the easy peasy instructions for creating your unique milk glass vases , and then show off your flower arrangement skills.
You'll not only spice up your meals but also create gorgeous decorations that add a personal touch to your home! get set to impress with your floral foam techniques and in no time, you’ll have the most charming table setting on the block.
Happy crafting!
Create Charming Milk Glass Vases: The Art of Elegant Centerpieces
Okay, friends! let’s dive into something super fun – making charming milk glass vases . these beauties aren’t just for show; they are the perfect backdrop for fresh flower displays or sweet home accents.
Imagine setting your dining table or coffee table with these captivating pieces. honestly, they're like a little piece of victorian chic in your place!
Essential Prelude: Get Ready to Create
Before we get our hands dirty, we need to cover some essential prep steps. Seriously, this is where you set yourself up for success.
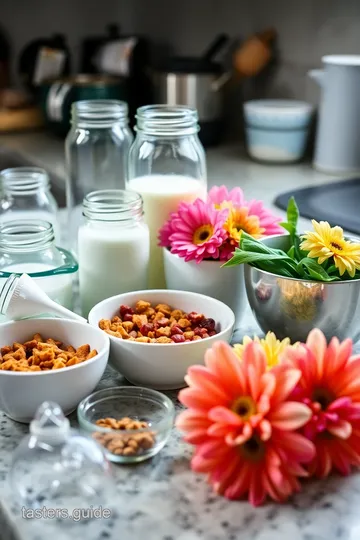
Mise en place is a fancy term that means everything in its place. gather all your supplies: clean glass jars (think canning jars or mason jars ), milk, water, dish soap, and of course, your glorious flowers.
Taking the time to prep saves you from scrambling later. it’s like when you’re cooking tacos – have all your toppings ready, right?
Now, let's talk time management and organization . we’re looking at about 20 minutes total, with 20 minutes active prep .
That includes washing your jars and mixing your milk solution. set a timer for important steps! walk away for 1- 2 hours to let your jars dry.
Use this time to sip coffee or flip through your favorite cooking show. you deserve it!
Don’t forget about safety considerations ! we’re working with glass here, so be cautious. keep those jars clean to avoid any kitchen mishaps.
And hold those scissors carefully when you’re snipping stems. nobody wants a hospital trip when you’re trying to elevate your home decor!
Step-by-Step: Making Milk Glass Magic
Ready? Let’s make this happen with these simple, numbered instructions!
-
Prep the milk glass mixture: in a mixing bowl, combine 1 cup of milk (240 ml) with 2 cups of water (480 ml) , and add 1 tablespoon of dish soap (15 ml) .
Whisk it up!
-
Coat the Glass Jars: Dip your glass jars into this mixture, making sure they’re fully coated. Wave goodbye to plain old jars and hello to vintage charm!
-
Drain and Dry: Place those jars upside down on a drying rack. Let them drain for 1- 2 hours . Patience pays off!
-
Seal it Up (Optional): For a lasting effect, consider applying a food-safe clear sealant. Follow the curing guidelines on the sealant.
-
Craft your flower arrangements: grab your fresh seasonal flowers, trim those stems, and if you’re feeling fancy, soak some floral foam to put inside the jar.
Now, start arranging. remember to play with height and texture for that eye-catching display!
-
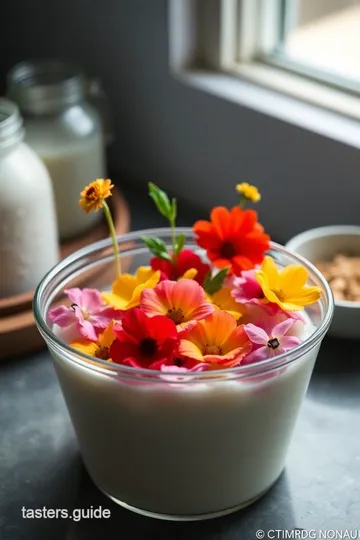
Display Your Masterpieces: Adjust the flowers to create visual interest. Finally, don’t just shove them in a corner – proudly showcase your milk glass vases as the centerpiece they are!
Expert Techniques: Hone Your Craft
So, here’s where it gets fancy! Want to take your work to the next level? Let’s talk professional methods and quality checkpoints .
Choosing the right floral foam and keeping an eye on the water level is critical for maintaining freshness. Change the water every few days and treat those flowers like royalty!
You might mess up – i know i have! for example, i’ve done arrangements that looked a bit wilted or awkward.
But learning to troubleshoot is half the fun! trim those stems at an angle, and don’t hesitate to swap out sad-looking blooms.
Success Strategies: Avoid Rookie Mistakes
Now, let’s wrap this up with some success strategies. Think about common pitfalls here:
- Overloading the vase — Less is more!
- Not cleaning the glass properly — Ensure a glossy finish!
- Ignoring water changes — Your flowers need hydration, too!
Feeling creative? You could even consider make-ahead options by prepping your jars in advance and storing them until the event day. Your DIY wedding centerpieces will thank you!
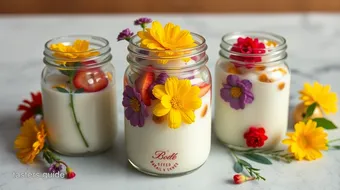
If you want to encourage those artistic vibes, remember, milk glass decor is all about that personal touch! play around with different flowers, even use opalescent vases or colored milk for a stylish twist.
So, are you ready to add those unique home accents and fantastic floral designs into your life? whether it’s that perfect sunday brunch vibe or an elegant dinner party, these milk glass vases will shine.
Next up, let’s explore some additional information to keep this creative vibe rolling!
Additional Recipe Information
Pro Tips & Secrets
Alright, let’s dive into the deets that’ll make your milk glass vases the talk of your next dinner party. the secret sauce? personal touches and a few crafty techniques that elevate your game.
First off, go easy on yourself. if you wanna save some time—prep all your flowers and jars ahead. you can whip up the milk mixture, dip the jars, and let them dry.
Honestly , while they’re drying, you can sip on some coffee or catch up on your favorite show. talk about multitasking!
When it comes to flavor enhancement—though we aren’t cooking a dish here, think about the overall vibe. use flowers that complement each other in color and size for a feast for the eyes.
If you add in some greenery like eucalyptus, it’ll not just look good but smell divine too!
Presentation matters, y’all! Place your vases on a colorful runner or use rustic decor ideas to frame them. A well-placed vase can totally transform your space!
Perfect Presentation
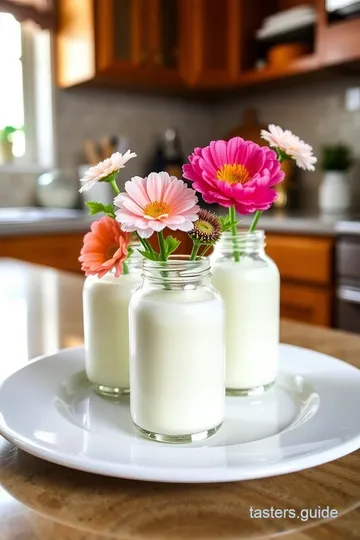
Now, let’s talk about making those milk glass vases pop on your table! start with plating techniques. group them in varying heights, sorta like a mini flower parade.
This will add depth to your table and catch everyone's eye.
For a garnish that wow-factors, think killer color combinations. team some opalescent vases with vibrant flowers; it creates a stunning contrast that’s hard to ignore.
Pro tip: you can also use candles around your flower arrangements for soft ambience; it’s such an easy diy craft.
Don’t forget those finishing touches! a sprig of fresh herbs or a thin ribbon can do wonders in pulling everything together.
It’s all about those little details that make your home decor feel special and personal.
Storage & Make-Ahead
So, you’ve made your gorgeous milk glass decor and want to keep it fresh? here’s the scoop: store your vases in a cool, dry place.
You wanna preserve that unique milk glass finish, right?
If you’re making these vases ahead of time, just fill them with flowers right before the event. change the water every few days if you’re keeping them longer.
The fresher the flowers, the better the vibe!
And if you need to reheat any components (like foam), just soak it in water again. Fresh is the name of the game!
Creative Variations
Feeling adventurous? let’s jazz things up with some creative variations. first, swap in colored milk—yep, yes i said it! seriously , tinted milk can create unique looks that pop.
You might wanna try seasonal twists too. for instance, in the fall, use earthy colors and add in branches for a cozy vibe.
Dietary modifications? okay, not really a food thing here, but if you’ve got guests with a flair for the fab, try faux flowers for stress-free arrangements.
They’re eco-friendly and can give you more time to work on those flower arrangement skills !
Regionally speaking, how about channeling a Southern-style with magnolia branches? This can give it a sentimental touch that will resonate.
Complete Nutrition Guide
Let's keep it real—when we’re crafting milk glass vases , there’s no caloric intake to worry about! but if we were to break it down, think homemade elegance that’s low in impact but high in style.
The health benefits? a tidy home space brings on positive vibes, and who doesn’t love that?
Portion guidance? Simple —one vase can do wonders, but multiple jars create more eye-candy. Spread ‘em out for a dramatic effect or cluster for a comfy, cozy feel.
Expert FAQ Solutions
You’ve got questions? I’ve got answers! A common concern is, “What if my jars don’t look exactly like that Pinterest image?” Don’t stress it! Each piece is unique—embrace the quirks!
If you run into trouble with floral foam, just trim it down or soak it longer. It's a learning curve, and every mistake is a chance to refine your skills.
Success tip: Always have fun with your arrangements. The beauty is in the experimentation. If it flops, just grab another jar and try again!
Conclusion
So there you have it! making your own milk glass vases isn’t just about crafting—it's about bringing your personal touch into your decor .
With a splash of creativity and a pinch of patience, you can totally transform your space with these lovely accents.
Keep the blooms fresh, switch up the styles, and have a blast while doing it! happy crafting, my friends! 🌸
Milk Glass Vases: Charming Centerpieces for Every Occasion Card
⚖️ Ingredients:
- 3-5 clean glass jars (e.g., canning jars, mason jars)
- 1 cup milk (240 ml)
- 2 cups water (480 ml)
- 1 tablespoon dish soap (15 ml)
- Food-safe clear sealant (optional)
- A variety of fresh seasonal flowers (e.g., roses, daisies, fillers)
- Greenery (e.g., eucalyptus, ferns)
- Floral foam (optional)
🥄 Instructions:
- Step 1: In a mixing bowl, combine milk and water.
- Step 2: Add the dish soap and whisk until mixed.
- Step 3: Dip the glass jars into the milk solution, ensuring they are evenly coated.
- Step 4: Place jars upside-down on a drying rack to drain excess liquid (allow to dry for 1-2 hours).
- Step 5: If desired, apply a clear sealant for added protection and allow it to cure as directed.
- Step 6: Prepare your flowers by trimming stems and removing excess leaves.
- Step 7: If using floral foam, soak it in water before placing inside the jar.
- Step 8: Arrange the flowers, inserting greenery and fillers for fullness.
- Step 9: Adjust flower heights for visual interest, ensuring a balanced arrangement.
- Step 10: Display the milk glass vases on a table or shelf, and enjoy!
Previous Recipe: Best Heavenly Honey-Rise Dinner Rolls: 5 Easy Tips for Fluffiness!
Next Recipe: Ultimate Wagyu Tallow Veggies: 5 Ways to Elevate Your Sides!